How to Choose the Best RGB Lighting for Your Gaming Rig
How to Choose the Best RGB Lighting for Your Gaming Rig
A great RGB setup should look stunning, reduce eye strain, and be easy to live with. The best RGB lighting for gaming rigs isn’t “more LEDs,” it’s a layered plan: bias/backlighting for comfort, ambient glow for mood, and front/task light for usability. Start by mapping your goals (immersion, comfort, streaming, or pure aesthetics), then choose hardware and control software that match your budget and skill level. In this guide, we’ll show you how to plan layers, pick compatible hardware, and dial in brightness and color so your rig feels immersive and comfortable without glare or clutter. Gaming Device Advisor favors simple, reliable control with minimal software overhead.
Start with goals and budget
Clarify what you want your lighting to do before you buy. This keeps your RGB lighting budget focused and your setup under control.
Quick framework:
- Pick a primary goal: ambience, eye-comfort bias lighting, content creation/streaming fill light, or reactive/immersive sync.
- Set a spend plan by layers: roughly 40% ambient/backlighting (strips/panels), 40% task/front lighting (monitor bar/key light), 20% control/cables/hubs.
- Decide your control path: motherboard software, a standalone controller, or open-source consolidation.
- Choose entry-level vs pro RGB: start small with value RGB lights and expand, or invest up-front in high-durability kits.
Note: RGB-enabled components usually cost more than non-RGB equivalents. Prioritize high-visibility zones first to maximize impact per dollar.
Plan your lighting layers
The best results come from a three-layer strategy—each layer serves a different purpose for comfort, balance, and style. As explained in BenQ’s gaming lighting guide, ambient, backlighting, and front-facing light together reduce glare, ease eye strain, and improve visibility without washing out your screen (BenQ: best gaming lighting ideas).
- Ambient: room glow and accent color that sets mood.
- Backlighting (bias): soft light behind your monitor to reduce contrast and eye fatigue.
- Front-facing/task: focused light on your desk/keyboard and on-camera fill for creators.
Map each layer to hardware:
- Ambient: RGB wall panels, ceiling/shelf strips.
- Backlighting: LED strips behind the monitor/desk edges, or combo monitor bars with rear glow.
- Front-facing: monitor light bars, compact key lights, or small soft panels.
Ambient lighting
Ambient RGB sets the mood but won’t fix visual balance on its own—pair it with bias and front light for comfort. Panels and ceiling/shelf lightstrips create a colorful wash that makes the room feel larger and more immersive. For color, warmer tones around 3000K are eye-friendly at night, while neon greens, blues, purples, and pinks remain popular for game rooms, according to this game-room lighting guide (SuperBrightLEDs: essential guide to game room lighting).
Backlighting and bias lighting
Bias lighting is a soft backlight placed behind your display to reduce the contrast between a bright screen and a darker room. By matching the screen’s color temperature, it minimizes eye strain and can enhance perceived contrast. The result: longer, more comfortable gaming sessions with less fatigue.
Backlighting behind the monitor reduces contrast and eases eye strain; match your screen’s color temperature—commonly around 6500K—to maximize comfort. For simple installs, use monitor-back LED strips. For a dual-purpose option, consider a monitor light bar that combines front illumination with a rear halo to cover both comfort needs at once.
Task and front lighting
Front lighting should illuminate your keyboard, controllers, and work surface without creating screen glare. Compact key lights or monitor bars are ideal because they’re dimmable and directional; the Elgato Key Light Neo is a strong compact option that’s easy to position and tune for on-camera presence, per PC gaming editors’ kit recommendations (PC Gamer: best RGB LED lighting kits). Mount above or at the top monitor edge, angle downward to avoid reflections, and keep brightness adjustable for late-night sessions.
Map visible zones for maximum impact
Plan your RGB placement where it will actually be seen. This stretches your gaming setup lighting cost further.
- Prioritize: monitor back, wall behind the monitor, desk edge, shelves, case interior panel (visible through glass), and your camera-facing area.
- De-prioritize: hidden components where RGB adds cost with little payoff.
- Use a quick checklist: mark each zone’s visibility (high/medium/low), pick your top 2–3 zones first, then expand later.
Pick the right hardware
Buy once, enjoy for years. Choose hardware that balances brightness, diffusion, and durability.
- Match hardware to layers: strips for bias/backlighting, panels/strips for ambient RGB, key lights/monitor bars for task light.
- Build quality: look for sturdy housings, reliable adhesives or aluminum channels, and long rated lifespans. For task/front lighting, choose high color rendering.
- Trade-offs: RGB RAM, case fans, and other components can be pricier; target the most visible parts first for a better value RGB lights strategy.
Strips, panels, and case components
Use this quick comparison to reduce decision friction.
| Category | Best use | Visibility impact | Ease of install | Typical cost |
|---|---|---|---|---|
| LED strips | Bias/backlighting on monitor backs, desk edges, ceilings; many kits include dedicated white LEDs for accurate color temps | High behind monitor and desk; subtle elsewhere | Easy (peel-and-stick; cut-to-length) | $15–$60 per run |
| Wall panels (hex/tri) | Ambient art and dynamic room wash; focal points behind monitors | Very high (on-camera and in-room) | Moderate (templates, mounts) | $80–$300+ per set |
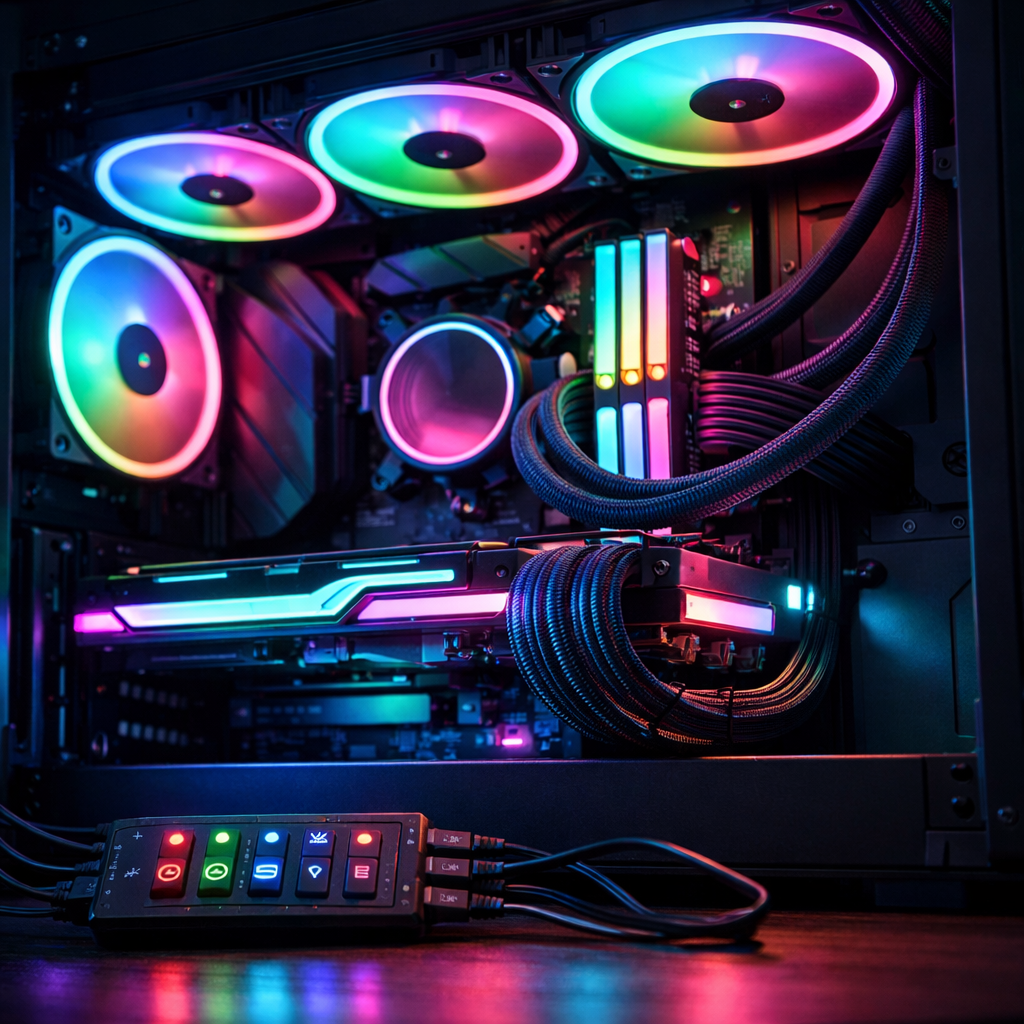
| Case components (fans/RAM) | In-case visibility through tempered glass; fans and RAM diffusers stand out | Medium–high if glass-facing | Moderate (PC build experience) | Fans: $40–$120 per set; RAM premium varies |
RGB vs ARGB and voltage compatibility
RGB uses a 12V 4‑pin header to power all LEDs on one circuit, so every LED shows the same color and effect. ARGB uses a 5V 3‑pin header with individually addressable LEDs, enabling per‑LED control and richer animations. Never mix voltages or connectors—mismatches can damage hardware. For header types, voltages, and matching controllers/hubs, see this concise overview (Kingston: complete guide to RGB lighting for your PC).
Pre‑purchase compatibility checklist:
- Check your motherboard manual for 12V RGB vs 5V ARGB headers.
- Buy devices, hubs, and controllers that match header type and voltage.
- Label cables and runs; avoid forcing connectors that “almost fit.”
Brightness, diffusion, and durability
- Brightness: Aim for moderate lumen output with dimming. Bright is good for accents, but bias light should sit behind edges to avoid screen glare.
- Diffusion: Prefer denser LED strips, milky channels, or well-diffused panels to eliminate hot spots and create a soft wash.
- Durability: Look for strong adhesives or mounting channels, reinforced corners on strips, and replaceable controllers/power supplies to support long-term reliability.
Choose your control ecosystem
Fewer apps, fewer headaches. Pick one primary ecosystem to minimize conflicts and background processes. Gaming Device Advisor generally recommends consolidating to a single control path or using OpenRGB for mixed-brand rigs.
Control routes:
- Motherboard headers/software and powered hubs.
- Standalone controllers (IR/Bluetooth/Wi‑Fi) for brand-agnostic control.
- Open-source or consolidation apps to unify mixed brands.
Motherboard headers and hubs
Use powered hubs or standalone controllers to centralize multiple RGB devices and ensure stable power delivery. Always match hub outputs to device type (12V RGB vs 5V ARGB) and respect current limits per channel; label runs and plan splitters/extensions before installation for a cleaner build (iBUYPOWER: controlling your RGB lighting).
Software and synchronization options
OpenRGB is an open-source controller under GNU GPLv2 that aims to replace multiple vendor apps with one lightweight interface; it supports Windows, Linux, and macOS (x86/ARM), plugin extensions, and a network-based SDK for custom sync (OpenRGB project site). For reactive sync, options range from simple 1D backlights to 4D full‑screen tracking via HDMI sync boxes and screen‑mirror kits; many users also recommend SignalRGB for multi-device control and presets in community roundups (Reddit: free RGB management software discussion).
Install and cable manage cleanly
- Dry-fit placement and confirm cable lengths.
- Clean surfaces with isopropyl alcohol.
- Use adhesive clips or channels; leave service loops at corners.
- Route to hubs/controllers, then test before final stick-down.
- Add low-profile raceways and Velcro ties; avoid tight bends at LED solder joints.
- Snap before/after photos to keep alignment consistent.
Calibrate color temperature and brightness
- Bias lighting: set near 6500K to match your screen and reduce eye strain; dim until reflections disappear.
- Ambient lighting: aim for warmer tones around 3000K in the evening for a relaxed feel.
- Save separate scenes for day vs night with different brightness levels.
Tune effects for comfort and cohesion
- Limit active zones to 2–3 complementary colors—or use a single accent plus neutral white—for clarity.
- Keep color temperatures consistent when mixing white and colored sources.
- For reactive setups, start with subtle 1D/2D effects, then expand to 4D only after you’ve tamed brightness and glare.
Test, iterate, and future proof
- Play 1–2 sessions, note hot spots or glare, then reposition or dim as needed.
- Future-proof: favor ecosystems with open SDKs/common protocols, leave spare header and hub capacity, and choose strips/panels with replaceable controllers for an easier upgrade path. Gaming Device Advisor validates these choices on mixed-brand builds to ensure smooth upgrades.
Editor-tested recommendations from Gaming Device Advisor
Our criteria: brightness headroom with smooth dimming, even diffusion, sturdy mounting, low software overhead, and reliable ecosystem support. For broader picks and long-term ownership tips, see our internal guide to value and pro options on Gaming Device Advisor. We also verify compatibility on mixed-brand rigs to confirm stable sync and easy control.
Top-rated RGB lighting picks by use case
Ambient/backlight strips
- Why: Integrated white LEDs enable accurate 3000K–6500K scenes; flexible placement for walls, shelves, and monitor backs.
- Consider: Screen‑mirror kits (e.g., Nanoleaf 4D) for reactive effects highlighted in enthusiast roundups.
- Pros: Versatile, affordable, easy to expand. Cons: Adhesive quality varies; needs careful diffusion to avoid hot spots.
Task/front light (Elgato Key Light Neo)
- Why: Compact, bright, and finely dimmable; easy to aim for desk work and on‑camera fill, per practical testing insights from PC gaming editors.
- Pros: Excellent control, tidy footprint. Cons: Pricier than basic bars; requires thoughtful placement.
Ecosystem builds (Razer Aether)
- Why: Cohesive multi‑device control across 16.8 million colors with PC/mobile management via Synapse and the Gamer Room app, ideal for unified scenes (Razer Gamer Room overview).
- Pros: Unified effects, broad device lineup. Cons: Ecosystem lock‑in; added software layer.
Best-value choices for balanced performance
- Addressable ARGB strip kits with diffusion channels and strong adhesives; choose ARGB over basic RGB if the price delta is small for per‑LED effects.
- Matter-capable smart bulbs or compact lamps for room wash on a budget; pair with strips for layered ambience.
- Affordable standalone RGB controllers or hubs to centralize mixed-brand systems without heavyweight software.
Turnkey options for streamers and creators
- Reactive kits: Govee AI Sync Box 2 (HDMI 2.1) and Nanoleaf 4D screen mirror deliver fast screen/audio sync; confirm HDMI pass-through limits and console/VRR needs before buying.
- Simpler audio-reactive setups: USB music-dongle controllers for plug-and-play reactive RGB.
- Choose ecosystems with cross-device control and effect libraries for quick scene changes, including mobile/PC control paths.
Related: top-rated gaming PCs to pair with RGB lighting
Match your lighting to quiet, capable 2023+ desktops with tempered glass panels, tidy cable management, and well-placed fans for clean reveals. Look for motherboards with both 5V ARGB and 12V RGB headers plus spare SATA/Molex for hubs; note that monitor bars and screen‑mirror kits don’t require internal headers. Quiet airflow designs make your RGB visible without adding noise. Gaming Device Advisor regularly tests desktops that meet these criteria.
Frequently asked questions
What is the difference between RGB and ARGB, and which should I choose?
RGB uses 12V 4‑pin headers where all LEDs share one effect; ARGB uses 5V 3‑pin headers for per‑LED control and animations. Gaming Device Advisor generally recommends ARGB for dynamic effects and RGB for simple, uniform lighting.
How bright should RGB lighting be to avoid eye strain and glare?
Set bias lighting to 6500K and dim until no reflections appear; keep ambient around 3000K at night. Gaming Device Advisor suggests starting low, then raising brightness until the room feels balanced.
How do I sync mixed-brand RGB devices without bloatware?
Use OpenRGB to consolidate control across brands, or pick a single primary ecosystem. Gaming Device Advisor prioritizes single‑app control to reduce background processes.
Where should I place LED strips and panels for the biggest visual impact?
Put strips behind your monitor and along desk edges, then add wall panels in your camera frame. Gaming Device Advisor prioritizes high‑visibility parts like case fans or RAM and skips hidden zones.
Do room color and size affect which RGB lighting I should buy?
Yes. Light walls amplify glow, so use fewer, dimmer lights or warmer tones; darker rooms may need brighter, well‑diffused strips or panels. Gaming Device Advisor recommends starting with bias/backlight, then adding ambient accents.