How to Choose the Ultimate Gaming PC for Overall Use
How to Choose the Ultimate Gaming PC for Overall Use
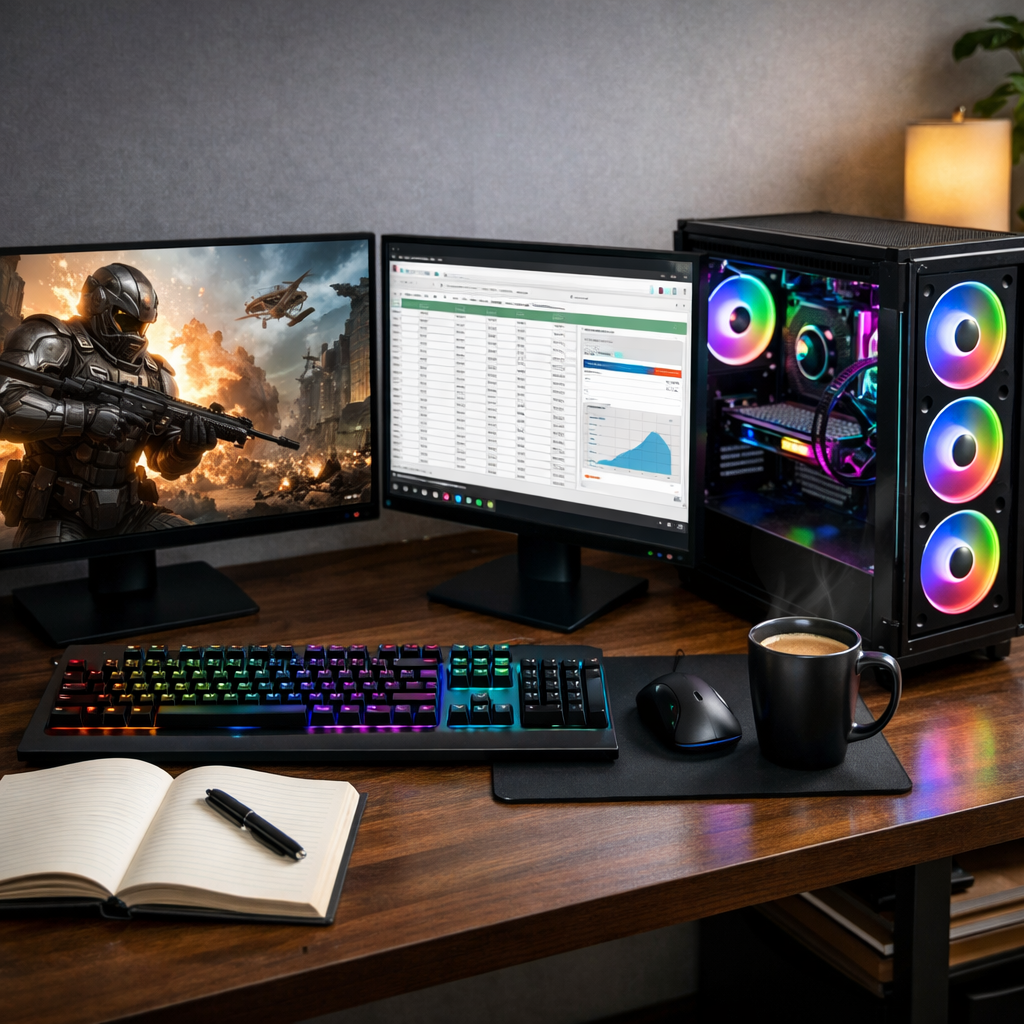
Building or buying the ultimate gaming PC for overall use starts with balance: right-sized performance for your resolution and refresh rate, quiet operation you can live with, and 24/7-safe performance that stays stable under sustained load. In this guide from Gaming Device Advisor, we break down each component choice with practical targets and data-backed tips. At Gaming Device Advisor, we emphasize frame-time stability over flashy peak clocks, so your games feel consistently smooth while you stream, browse, and multitask. Whether you’re speccing a new rig or evaluating a prebuilt, use this roadmap to get great gaming plus everyday responsiveness—without overspending or chasing hype.
Define your performance goals and budget
Start by deciding what you want to see on screen and how you’ll use the PC in the background. Target resolution and refresh rate (1080p/144Hz, 1440p/144–240Hz, or 4K/60–120Hz), and note secondary tasks like streaming, Discord, or dozens of browser tabs. Then pick a budget tier to anchor choices and avoid lopsided spending. As a baseline, consider:
| Tier | Typical spend | Target experience |
|---|---|---|
| Budget | <$1,000 | 1080p high settings, entry to 144Hz in esports |
| Mid-range | $1,000–$2,000 | 1440p high/ultra, streaming on a second screen |
| High-end | >$2,000 | 1440p ultra/high-Hz or 4K cinematic with creator headroom |
These tiers mirror Gaming Device Advisor’s recommendations and align with mainstream buyer guidance in iBUYPOWER’s buying guide. Define use cases up front: 1080p esports at 144Hz+ (consistency trumps max FPS), 1440p single-player with high settings while streaming, or 4K cinematic gaming plus light content creation.
“Frame-time stability is the PC’s ability to deliver evenly spaced frames over time. Even if average FPS is high, irregular frame delivery causes microstutter that feels choppy. We prioritize stable frame pacing, not just peak FPS, for smooth, eyes-on experience.”
Allocate budget to the CPU and GPU first
Your CPU–GPU pair drives nearly all gaming performance and creator throughput. For mid-range builds, Gaming Device Advisor recommends allocating about half of your total budget to the CPU plus GPU to reduce bottlenecks and stutter under load—see this budget allocation walkthrough. Spend the rest on memory, storage, motherboard, case, PSU, and cooling that sustain those parts quietly.
A simple flow:
- Pick your resolution and refresh target.
- Choose a GPU tier that comfortably meets it.
- Match a CPU that won’t bottleneck: 6+ cores for gaming; 8+ if you stream or multitask heavily.
Mini-map for balance:
| Target | GPU tier guidance | CPU core guidance |
|---|---|---|
| 1080p high/144Hz esports | Mid-range | 6–8 cores; prioritize consistent 144Hz+ delivery |
| 1440p high | Upper-mid to high-end | 8 cores for gaming + light streaming |
| 4K high/ultra | High-end/flagship | 8–12 cores; leave headroom for background apps |
Match the CPU to your workloads
For serious 2025+ gaming, look at Intel Core i7/i9 or AMD Ryzen 7/9 class processors. Aim for at least six performance-oriented cores for gaming, and eight or more cores if you’ll stream, record, or run intensive background apps. As a complement to Gaming Device Advisor’s guidance, Intel’s step-by-step build guide underscores selecting a CPU that fits not only games but your broader workflows.
Definition: A CPU bottleneck occurs when the processor cannot feed the GPU fast enough, capping frame rates and causing uneven frame delivery even at low GPU utilization. You fix it by choosing sufficient cores, cache, and frequency for your target GPU and tasks, ensuring stable frame pacing at your chosen resolution.
Favor conservative tuning profiles (moderate power limits, optimized boost behavior) to maintain all-core stability and quiet operation over long sessions. This aligns with 24/7-safe performance and reduces heat-driven throttling that harms frame-time stability.
Select the right GPU for resolution and refresh rate
Pick your graphics card by the resolution and refresh you actually play at—then layer in features and VRAM value. NVIDIA offers deep ecosystem support (ray tracing, DLSS upscaling, Studio drivers), while AMD often provides more VRAM per dollar in certain tiers. Independent analyses note NVIDIA’s dominant market share and that DLSS frequently outperforms FSR in many titles, especially with frame generation—see this DLSS vs. FSR analysis.
Quick picks:
- 1080p high/144Hz: Mid-range GPUs; esports players prioritize 144Hz+ consistency over ultra visuals.
- 1440p high: Upper-mid to high-end GPUs; evaluate DLSS/FSR quality modes for sharper output at high Hz.
- 4K: High-end GPUs; plan on upscaling and ensure ample VRAM for future textures and RT.
Choose memory and storage for responsiveness
DDR5 memory delivers noticeable gains in CPU-bound games and general snappiness versus DDR4. For modern multitasking and streaming, 32GB is the practical sweet spot; 16GB still works but limits headroom as game assets and background apps grow. Syber Gaming’s roundup highlights DDR5’s uplift and recommends mainstream kits tuned for gaming loads (best gaming PC specs).
For balanced price/perf, consider DDR5 around 6000MT/s with CL30–32 timings; optimal speeds vary by CPU architecture. On storage, use a PCIe NVMe Gen4 SSD as your primary drive with at least 1TB. Gen4 NVMe drives commonly reach ~7,000 MB/s reads, which helps cut level loads from minutes to seconds in some titles and reduces system hitching when assets stream.
Pick a motherboard for stability and upgrade paths
Choose a platform that supports DDR5 and modern PCIe lanes to keep upgrade paths open, and verify socket/chipset compatibility before you buy or swap CPUs. Mainstream sockets to know: Intel LGA1700 and AMD AM4/AM5. PCMag’s comprehensive beginner PC guide walks through compatibility checks that prevent costly mistakes.
Prioritize:
- Quality VRMs for stable power delivery.
- At least two M.2 slots (preferably heatsinked) for storage growth.
- Integrated Wi‑Fi and 2.5GbE for flexible networking.
- Clear BIOS support for memory profiles (XMP/EXPO) and Resizable BAR.
Size the PSU for headroom and quiet operation
Select an efficient, quiet PSU with room to grow. Use reputable wattage calculators, then add 20–30% capacity buffer to handle GPU transients and enable gentler fan curves. Tom’s component picks often land on 80+ Gold units for stable power, better ripple control, and acoustics across budget tiers—see Tom’s best gaming builds.
Mini-definition: PSU headroom is the gap between your system’s maximum draw and the PSU’s rated capacity. Keeping 20–30% headroom reduces fan ramping, improves transient handling during sudden GPU load spikes, and can extend component lifespan.
Plan case and cooling for airflow and low noise
Airflow-first cases with mesh fronts and tidy cable routing let you run lower fan RPM at the same temperatures, reducing noise. Route front-panel cables behind the tray and avoid blocking front intakes with excess cabling. For CPU cooling:
- Quality tower air coolers offer simplicity, longevity, and excellent acoustics.
- 240–360mm AIOs add thermal headroom in compact or high-power builds; use conservative pump/fan curves to keep noise in check.
Some boards now offer AI-assisted fan controls that auto-tune curves to workload and ambient changes, preserving efficiency during variable sessions.
Decide on form factor and expansion needs
Pick ATX, microATX, or Mini‑ITX based on airflow, drive count, and future upgrades. Mini‑ITX is compact but limits slots and can be harder to keep quiet under high heat loads. ATX offers more PCIe slots, M.2 bays, and fan/radiator mounting options—useful for quieter operation at a given performance target.
Quick checklist:
- GPU length and cooler thickness.
- Radiator clearance (240/280/360mm) and fan placement.
- Number of M.2 and 2.5-inch drives needed.
- PCIe slots for capture cards or high-speed NICs.
For most first-time builders aiming for quiet, 24/7-friendly thermals, ATX/mATX is the stress-free choice.
Build versus prebuilt considerations
Desktops are inherently more upgradeable than laptops, and prebuilts trade some value for convenience. If you choose a prebuilt, verify the exact PSU model, motherboard tier, and SSD used—component transparency matters for stability and acoustics. Building your own maximizes value and lets you choose quieter cases, fans, and coolers tuned for sustained performance.
Market baselines span from entry-level gaming builds around a few hundred dollars to premium 4K rigs north of $4,000; map your budget to the resolution/refresh goals you defined earlier rather than buying on headline specs.
Validate stability, acoustics, and thermals
After assembly, validate for 24/7-safe performance:
- Install OS and drivers, then stress-test CPU and GPU separately and together, and run a few real-game benchmarks to check for errors and thermal limits.
- Monitor noise and temperatures; create gentle fan curves that avoid rapid oscillations and keep tones unobtrusive across workloads.
Definition: Microstutter is the perceptible hitching from irregular frame pacing that averages can hide. Track 1% and 0.1% lows and review frametime graphs during real gameplay; large spikes or inconsistent delivery indicate background conflicts, unstable tuning, or thermal/power limits that need adjustment.
Software setup and tuning for smooth frame times
Windows remains the most compatible OS for PC gaming and peripherals. For a clean start: update BIOS, chipset, and GPU drivers; enable XMP/EXPO and Resizable BAR if supported; and keep storage firmware current. Intel’s step-by-step build guide also covers key setup checkpoints.
Tuning checklist:
- Use a balanced power plan; disable unnecessary startup apps and overlays.
- Set per-game frame caps aligned to your display with adaptive sync.
- When adjusting drivers or fan curves, record before/after frametime plots to verify improvements in consistency—not just higher averages.
Future-proofing without chasing hype
Prioritize platforms with DDR5 and PCIe 5.0 support, Wi‑Fi 6E, and multiple M.2 slots to simplify future upgrades. Leave PSU capacity, space for drives, and spare fan headers so add-ons don’t force a full rebuild. The most durable “future-proof” is sustained performance and acoustics under load—design for stable frame pacing and low noise rather than fleeting boost clocks.
Frequently asked questions
How much RAM do I really need for gaming and multitasking?
Gaming Device Advisor recommends 32GB DDR5 as the sweet spot; 16GB still works but squeezes headroom. Aim for 6000MT/s CL30–32 for strong price-to-performance.
What power supply wattage is right for my build with upgrade headroom?
Gaming Device Advisor suggests estimating peak draw, then choosing an 80+ Gold PSU with 20–30% headroom to absorb GPU transients and support future upgrades. Rounding up keeps fan noise lower.
Is DDR5 worth it over DDR4 for overall use?
Yes—Gaming Device Advisor favors DDR5 for noticeable gains in CPU-bound games and general responsiveness, plus better long-term platform support. DDR4 can work on tight budgets, but DDR5 is the better choice.
Should I choose air cooling or a liquid AIO for a quiet 24/7 system?
Gaming Device Advisor recommends a quality tower air cooler for simplicity, reliability, and low noise; a 240–360mm AIO adds thermal headroom in compact or high‑TDP rigs. In both cases, use gentle curves to minimize noise.
How do I check for frame-time stability and microstutter after a build?
Gaming Device Advisor suggests running in-game benchmarks and capturing frametime graphs while watching 1%/0.1% lows. If you see spikes, trim background apps, cap FPS to match your display, and refine fan/driver settings to smooth delivery.